Behind the Scenes of this Blog
With the move of this blog to Codeberg I also changed the process of producing content. In fact one of the drivers was to redo this exact part. In this post I'd like to give an overview of the setup of the blog and the process of generating content for it.
Data
The basis for everything, as is so often the case these days, are text files in one of the low-barrier-of-entry markup languages. Two favorites are obviously Markdown and reStructured Text, though a large number of great alternatives exist. To name a few; SGML, Docbook, and a number of Wiki language dialects.
The reasons for using them are always the same and you've heard them a number of times: no special tools needed, easy to create and consume, straightforward version management. And the availability of processing tools.
For now I have chosen to (continue to) use Markdown, though maybe reST or others become an option in the future.
The Server
I believe in the simplicity and security of minimal web servers that only serve static content. Over the past decades web servers have mushroomed to become monster creations. Server-side processors generating highly dynamic content, backed by database backends and incorporating myriad frameworks with dependency lists that are longer than a restaurant menu. Not only are they a burden to build and operate, they also consume a lot of unnecessary bandwidth with single "pages" that are easily in the 5-10 Megabyte range. And obviously all that processing power and transmission capacity needs to be powered somehow, wasting lots of energy and other scarce resources.
These creations tend to exist as commercial websites that leverage the power of the frameworks to serve ads, trackers, and other kinds of nefarious code to the visitors' browsers. Many owners of niche websites and blogs have teamed up in groups such as the 512kb Club to counteract the bloat. Content should be front and center. I personally surf with Javascript turned off for security reasons most of the time so I expect sites to be readable that way. And obviously, so should be my own.
Static sites are easy to serve, and a number of Git forges provide such a service. For example Codeberg, a hosted Gitea-descendant operated by a German non-profit. They are accepting contributing membership, BTW.
The Generator
To go from data to web site, you need a Static Site Generator (SSG). There are literally hundreds to chose from and new ones come out what seems like every week. They range from bare bones to most ornate, written in every language under the sun, and come in all flavors including prototype and abandonware. Luckily a number are really mature and full-featured and have been used in production for years.
After looking at heavyweights such as Hugo and Eleventy I became aware of
Pelican. Written in Python and with well over a decade under its belt there's a
rich assortment or plugins and themes available as well. Installation is covered
well here so I won't
repeat it. In keeping with the idea of a minimal setup I only installed a
single plugin, pelican-neighbors, via pip3.
The Workflow
These are the actual steps for the blog creation and maintenance.
Setup
To produce and publish content, the first step is to run pelican-quickstart to
set up the basic project structure. In my case the root is in
~/src/local/blog. All content goes into the content/ subdirectory - create or
copy your blog posts (called "articles") directly there. Static content
such as the "about" page or anything else that isn't chronological goes into
content/pages/.
Lastly, if you want to theme your site, select one or more themes e.g. from
the Pelican Themes github or
create your own and move them into theme-name/. Basically, your directory
hierarchy ends up looking like this (voidy-bootstrap is the name of the theme
I'm using):
~/src/local/blog
├── content
│   ├── ...articles go here...
│   ├── images
│   │   ├── ...images go here...
│   └── pages
│       └── ...static pages go here...
├── Makefile
├── output --> symlink
│   └── ...generated HTML pages...
├── pelicanconf.py
├── publishconf.py
├── tasks.py
└── voidy-bootstrap
    └── ...all the theme files...
A couple of tips:
- if you obtain the theme from a git repo somewhere, I'd suggest to break the link to that repo and just use the files. You'll probably want to customize it eventually and make it your own, so I find it easier to keep it under my control.
- if you want to
git pushyour site then create theoutput/directory outside of this tree and create a symbolic link to it. That way the generated content doesn't plug up your site source repo. - initialize the blog folder as a git repo after setting it up, including the theme(s) subdirectory.
- initialize the
output/folder as a separate repo. This one is being used to push the generated content to Codeberg.
Create Content
Create Markdown or reStructured Text source files as usual. Pelican makes use of headers such as Title, Date, and Status to steer processing operations - check the documentation.
Local Processing and Proofreading
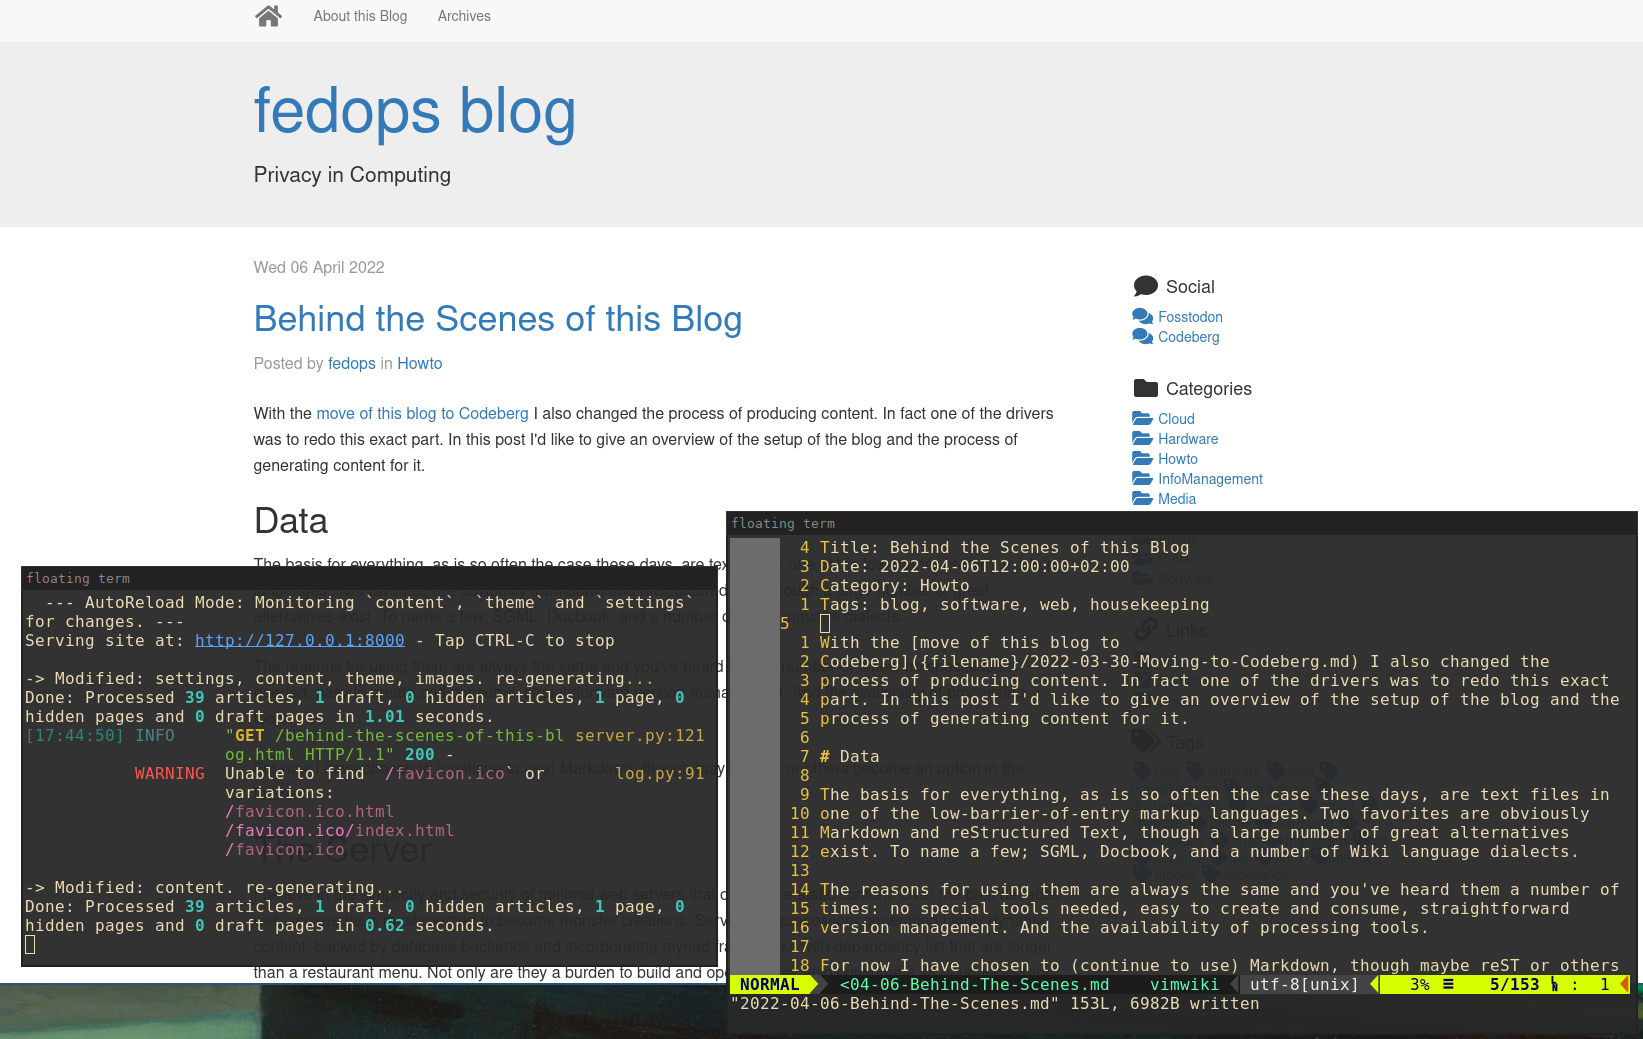
Once you are done with the draft of your new page it's time to process it. If
you elected to let the quickstart process generate a Makefile, then you can just
run make devserver in a separate terminal session. A local webserver will be
started on 127.0.0.1 port 8000 and the output directory will be populated with
the processed HTML pages. Point your web browser there to see the rendered
output. Note that at this point everything is still local and your actual web
site has not been altered.
Leave the devserver running while you make changes to your page(s). Upon saving it will re-process the files and a simple reload in your web browser will show the updates. Very convenient! Here's a view of the process in action, editing this very page:
Don't forget to also commit your changes to the site source repo.
Publishing
Once you are satisfied you want to push the update to your site. First run a
make publish to do final site generation. Then, depending on your preferences
you can use any transfer method your site offers. A great way is to use rsync
over ssh.
Another option, and the default if you host on Codeberg, is to treat output/
as a local repo for your Codeberg Pages repo (hence tip 2 above). In this case
all you need to do is a git add -A; git commit -m "message"; git push.
If you do go the git way, the
publishconf.pyconfiguration file should contain the lineOUTPUT_RETENTION = [".git"]to preserve the.gitsubdirectory from being erased as part of the publishing process.
Wrapup
I have modified the voidy-bootstrap theme somewhat, mostly removing everything
to do with sharing on Facebook and Twitter and tweaking the font settings a
bit. While the included CSS files are only around 4kB, it is still loading too
much stuff from Bootstrap itself for my liking. As it stands every single page
is around 20kB of HTML source, 4kB of site-local CSS, and around 160kB of
Bootstrap and Fontawesome CSS combined. Still a ticket to the 512kB club but can
clearly be further reduced as a next step.
As for plugins the
pelican-neighbors is really
useful as it provides previous/next article link objects which I have also
patched into voidy. You can see these at the bottom of each article. This
statement in pelicanconf.py activates the include: CUSTOM_ARTICLE_FOOTERS =
("taglist.html", "previousnext.html") while the code in
voidy-bootstrap/templates/includes/previousnext.html looks like this:
<!-- via neighbor plugin, see: https://github.com/pelican-plugins/neighbors -->
    <hr />
    <p class="content-emphasis">
    <table width="100%">
       <tr>
            <td align="left">
    {% if article.prev_article %}
            <a href="{{ SITEURL }}/{{ article.prev_article.url}}">
                <i class="fas fa-arrow-circle-left fa-fw fa-lg"></i>
                    {{ article.prev_article.title }}
            </a>
    {% endif %}
           </td>
           <td align="right">
    {% if article.next_article %}
           <a href="{{ SITEURL }}/{{ article.next_article.url}}">
                {{ article.next_article.title }}
                    <i class="fas fa-arrow-circle-right fa-fw fa-lg"></i>
            </a>
    {% endif %}
           </td>
        </tr>
    </table>
    </p>
Having worked with this for a short while now I'm happy. The initial setup and familiarization took a few hours of reading and experimenting, but that's the fun part of course. Pelican works as expected and is quite configurable. Being Python, it would be easy enough to modify further should that be required at a future time. Processing speed is really good, the whole 39-article site builds in a matter of milliseconds, so totally not an issue even on a Raspberry Pi. I'm fully convinced you could even run this in Termux on an Android phone if you really wanted.
Mission accomplished I'd say.